
Below are some installation tips for roof racks. If you find you need more help or have additional questions, use our Contact Us form to get in touch.
Roof Rack removal
Prior to installing your rack you must first remove your old one. This is a well-documented process and you should be able to easily find info on this specific to your vehicle, here are a few tips we have found to be most relevant and worth adding here.
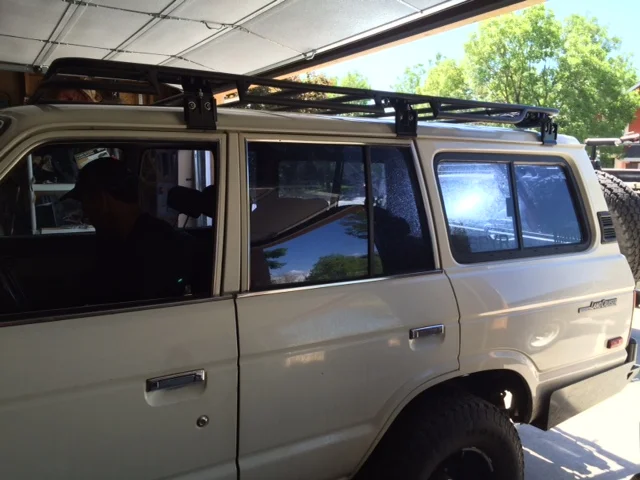
60/80 series:
Squirt penetrating oil onto the screw heads for several days prior to removal. Once removed, you can put smaller bolts back into those same holes, using some silicone (see below) and rubber sealing washers. You only have to remove the long raised rails on the sides, you don't have to remove the thinner rails that are secured to the roof in the center. On the 80 series, if you're running 45 degree towers you actually don't have to remove anything, however it makes using your new rack a little easier if you get that old one out of the way, regardless of the fact that it will clear it. Looks better too to just have one rack.
100 series:
You will need to find a T-30 Torx driver for LX models, 12mm for Land Cruisers. Either way, you won't use those bolts again, and you may not ever use that T-30 tip again... chance you got one with that cheap set of screwdrivers and/or drill attachments you bought.
on LX models, they didn't put a bolt in the forward location of your center towers. So there is going to be a bunch of dirt in there... when you get the rack off, squirt some lube in there, then run a bolt down with nothing on it. better yet, run a M8 x 1.25mm tap down there to clean those threads up, otherwise it's possible to bugger this one up when you install the rack.
The 1" wide rubber strip can stay on, if you are going from a 3-tower per side factory rack to a 3-tower per side Gamiviti rack. But it won't keep all the needles and water out of that channel, there will be a gap around the towers. So we think it's better to just pull that rubber thing off, regardless of rack, that way you can visually inspect what's going on up there periodically, and keep the area clean.
120/200 series:
Probably the best tip on removal is go slow, and slowly ease out both bolts at the same time. Inside your roof is a little backing plate with 2 nuts on it, held in place by these little plastic sleeves around the bolts, and a small retainer clip. If you are too aggressive with a bolt (like pushing down) you can dislodge that plate, then it will be swimming down in space below your roof above the headliner. This isn't the end of the world, but it can slow down the process.
To deal with a plate that has come loose, first remove all tower stuff completely so you have a clean roof surface. Then take one of the M8 bolts and try to thread it into one of the nuts- you may need to run to the store to buy an even longer M8 bolt if it's way in there, or possibly use a poker (coat hanger, skinny screwdriver, etc) to move it around, again the thread is M8x1.25 if you need it. But once you get one side started, you can use that bolt as a handle to get the other side into view, at which time you thread another bolt in there. The goal is to have bolts in both sides, then add the tower.
So once you have bolts in both sides, remove one of them, then reinstall the bolt now running through your tower. Once one side is started, then do the other side, then slowly work both bolts in until the tower is secure.
The 1" wide rubber strip really has nothing holding it on. It was smashed in place by the factory towers, but with those out it will just fly off if you don't remove it now. Most people don't try to retain those, instead just run a clean channel.
Here’s a video showing how to remove a roof rack on a 200 series:
Roof rack installation - roof channel racks
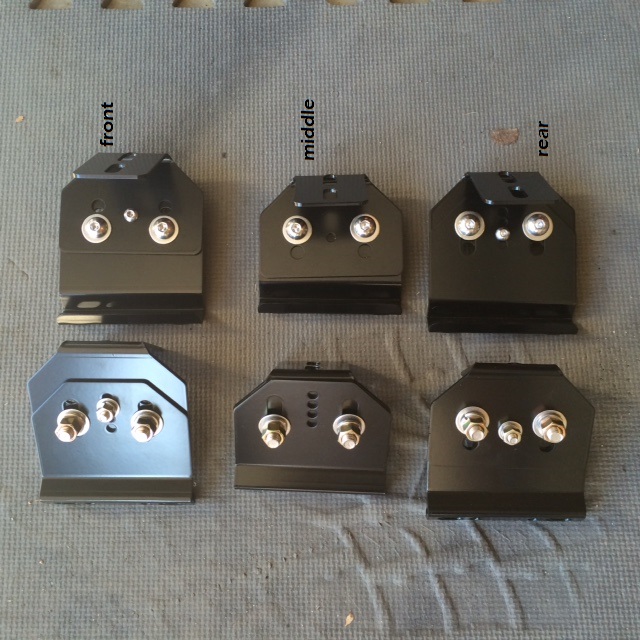
Here are two photos photo showing the channel tower setup for a basic rack setup without a light bar dropdown feature. Racks that have either the tapered Expo or cut-style light bar drop down will want to run the front at the highest setting . Note that the middle towers do not have a small 1/4-20 bolt, this is only necessary in the front, to insure the rack is level with the vehicle.
To make installation of the towers at the back of the sunroof easier, position the top portion of the tower behind the base of the tower. This will shift the top of the tower towards the inside of the roof more, and make it easier to get that inside bolt started.
Remember to place the towers on the vehicle first, then lift the rack onto them. Put all of the bolts through the rack into the towers before adding the washers and nuts. Once the bolts are all in your desired location the nuts can be added and secured finger tight.
When tightening the rack, start with the inside top bolt first (securing the tower to the rack) followed by the outside rack bolt. Second, tighten the middle bolts that hold the tower together. And finally, tighten the bolt going into the roof of the vehicle last.
Note: on models with a Light bar drop-down, or tapered Expo bar, and racks with 8 towers, start with the lowest possible setting (or no bolt) in back (no adjustment bolt at all), and the highest possible setting in front. This is a good safe starting point to guarantee clearance across the front of the windshield, as it's close. Once you get it snugged down, you can consider lowering the front tower to dial in the fairing clearance... tighten the middle towers at the end, once you have already set the final height.
Start by putting the towers together, see the above picture for a guide. For non-drop down racks, try the front towers do the 3rd highest setting, the back do the second highest, that's a good start. The middle don't use the center height bolt, just put it together as low as it will possibly go. Note how the front tower has the top that goes in front of the bottom, while the back tower has the top part behind the bottom, that's to help compensate for the taper of your roof.
Bolt all the towers to the truck, using a little silicone on the bolt holes. If you don't have the stock rubber pads, you can use some rubber washers between the roof and tower. Only finger tighten the towers, just in case you need to slide one. Here's a picture of a good silicone to use:

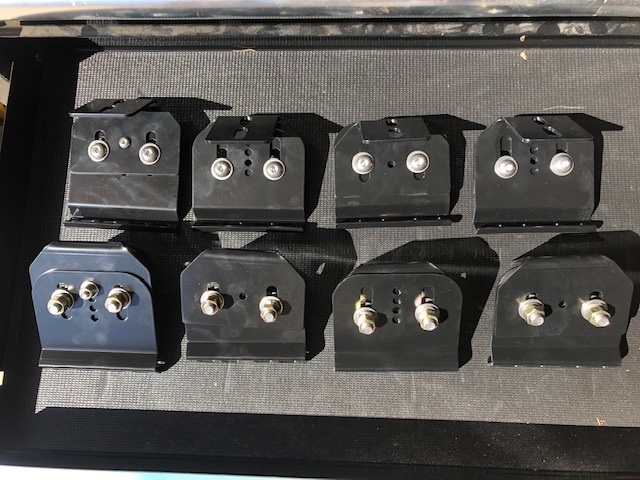
Note how the tower bases have multiple slots- it’s important to do this symmetrically, so the spacing between the towers is the same on both sides of the truck. On 200 series with 4 towers per side, here is a picture of all 4 tower locations.


Note how the forward tower is as far forward as it can go, and the tower just behind it is as far back as it will go. Also note the location of the bolts going into the rack.
Once you have all of the towers loosely bolted to the vehicle, have someone help you lift the rack in place, and put all the top bolts through, the whole thing should be very symmetrical. Once you have bolts through all of the towers, start adding washers, lock washers, and nuts to just the rearmost and forward towers to the truck. No need to crank them, just enough to compress the lock washers.
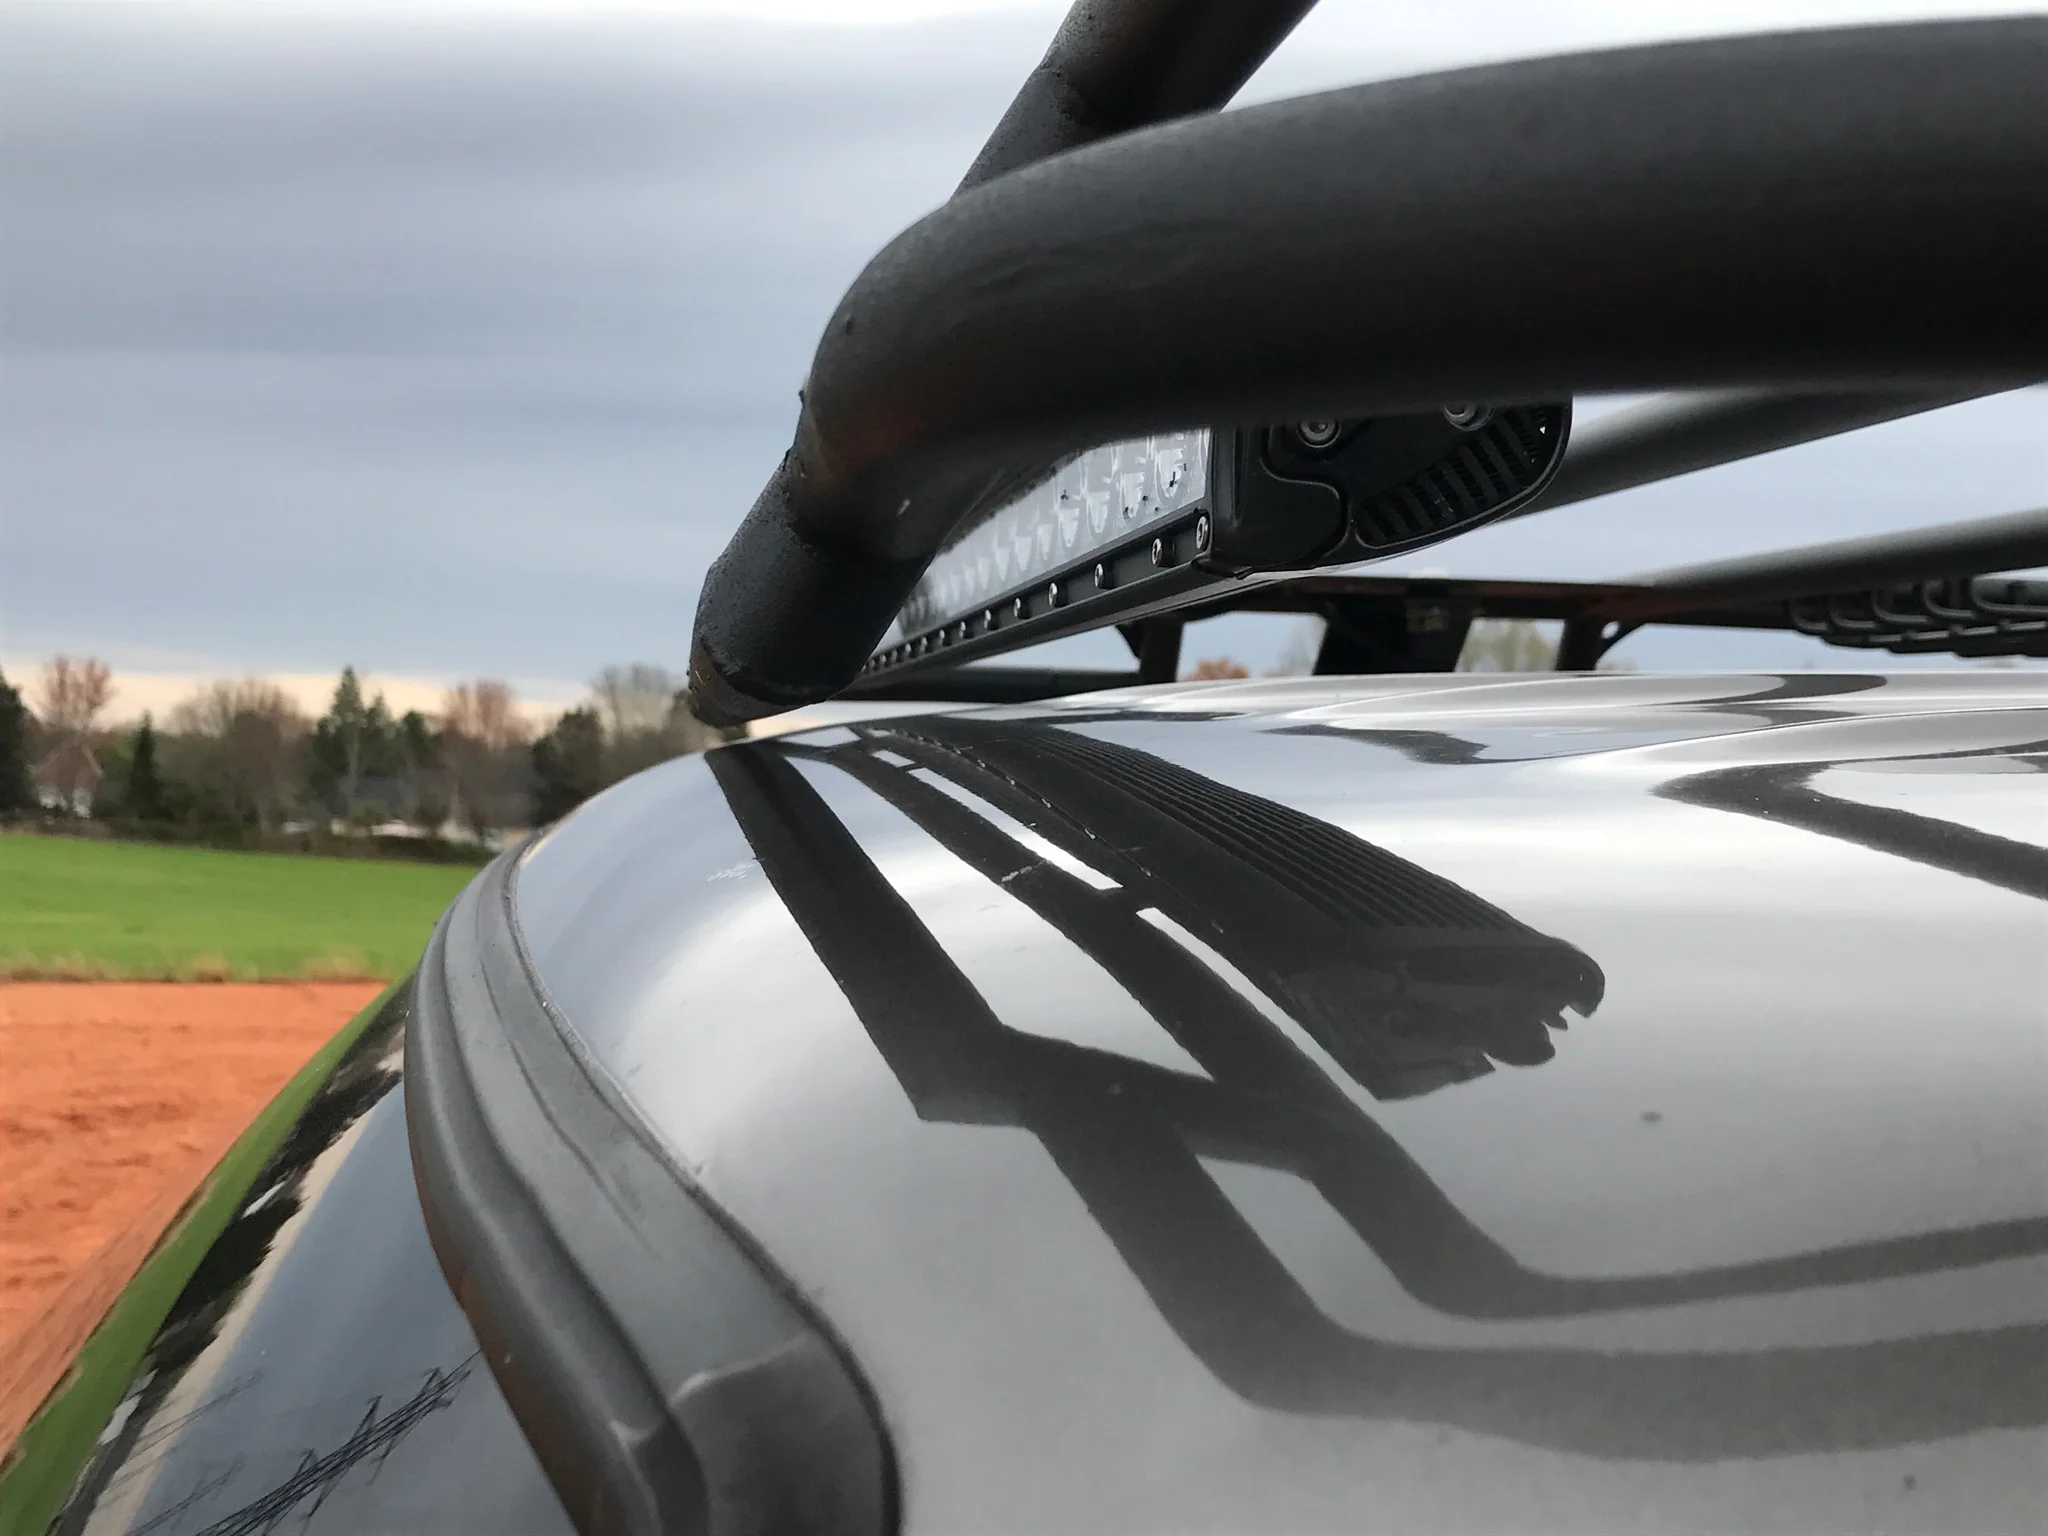
Inspect the gap in front below the rack and/or fairing. Insure there is at least 1/4” gap between the lowest part of the rack or fairing and the roof, push down on the rack in front to see what it might do under load. To increase the gap you can raise the front towers (if not already at the highest place), you can move all of the the towers forward on vehicle (within the slots, so maybe 1/4” here at most) e, or on some 3-tower racks you may be able to shift the entire rack forward by one slot- sometimes it’s necessary to remove the front adjusting bolt completely, then push the front tower up even further.
Tower Bolt Tightening Sequence
1. Begin with installing the bolts through the rack plates, beginning with running just the bolts through the rack to get the rack and tower position set. Put 2 bolts/washers through each tower.
2. Put the front towers at their highest position, using the small 1/4-20 bolts provided through the center holes. no need to put nuts on the back at this time.
3. The bolts that connect the towers pieces together should be tight enough so that there is no gap between the tower pieces, but loose enough so that the tower pieces can still slide freely.
4. Tighten the inside bolt of the front towers- this will pull the tower up close to the rack, and actually pull the rack down as this happens. Watch the gap in front between the rack and vehicle roof, you want this gap to be about 1/4" but no closer. If the gap is too large, then loosen the rack bolts that you just tightened, remove the 1/4-20 bolt then slide the tower down to the next lowest position, re-insert the 1/4-20 bolt then tighten the top bolt on the inside and repeat the process. If the gap is too close, then raise the rack by moving the 1/4-20 bolt to a higher position, and if necessary remove the bolt completely to allow the tower to slide up even further, tightening the side bolts in the tower to secure the height.
5. Next tighten the 2 M8 socket head bolts that run into the roof of the vehicle. This will pull the tower down a little bit as the rubber sealing washers compress, so again pay attention to the gap in front. For rain gutter racks, tighten the single clamp nut.
6. Finally, tighten the 2 center bolts of the tower, which are holding the 2 tower pieces together.
7. After you have the rack height set, then you may now tighten the rest of the bolts. Follow the same sequence as you did in the front;
- start with the top bolts that connect the rack to the tower, beginning with the inside bolt
- second are the 2 bottom bolts that connect the tower to the truck. for rain gutter racks, tighten the single clamp nut.
- third are the 2 bolts running through the center of the tower, which hold the 2 tower pieces together.
Following this sequence will insure the rack height remains consistent, the towers are all tight to the rack and tight to the vehicle, and nothing is under load or stress.
Last thing to do is add nuts and washers to those 1/4-20 height adjusters which should be in the front only, or front & back only,
Here’s the installation all over again, in video form:
Roof rack installation - Rain gutter racks
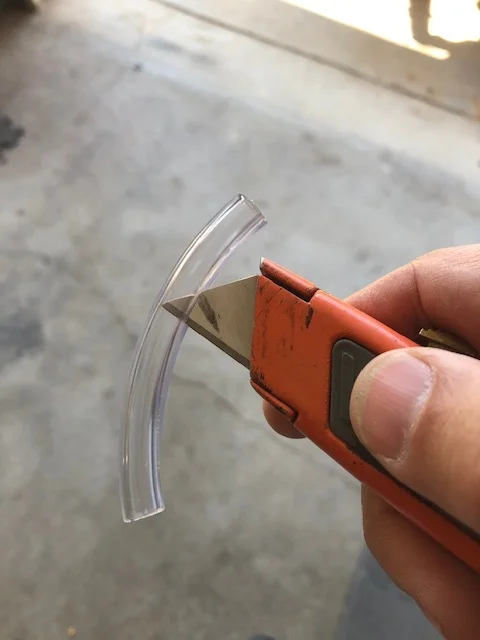
If you’ve got one of them pretty trucks, create some protective skins for the tower bodies to prevent scratches from the rack tower. If it’s a wheelin’ rig, you can ignore this part.. . get some 3/8” ID PVC tubing from the local hardware store, and cut pieces approximately 4” long, one for each tower body. Use a wire cutter or scissors to cut it. Then slice one side of the tube lengthwise with a utility knife. Slip this over the base of the tower body, then tip it forward and install the clamp from below.


Start by clamping just the rearmost and forward towers to the truck. Place the front towers at their highest position, and snug up the bolts to hold them there, just enough to compress the lock washers. Clamp the towers to the roof finger tight, so they will stand up on their own. Have a partner help you lift onto the towers from the back, setting it on the towers. Install all of the bolts & washers from the top of the rack through the towers, insuring each plate is symmetrical with the other side. Once the towers are in position, add the washers, lock washers, and nuts to the rack bolts and snug them up - no need to crank them, just enough to compress the lock washers.
Inspect the gap in front below the rack and/or fairing. Insure there is at least 1/4” gap between the lowest part of the rack and the roof, push down on the rack in front to see what it might do under load. To increase the gap you can raise the front towers (if not already at the highest place), you can move the tower reward on the plate, or you can slide the entire rack forward- do whichever looks best to you. Check the bottom of the fairing relative to the roof of the vehicle- you want a minimum of 1/4” of clearance here… to adjust either raise the rack or trim the fairing. Trimming the fairing is easy- use a band saw or jig saw, place masking tape down first to use as a guide.
For even more, check out our 60 series installation video: